Ready to flaunt adorable Valentine's Day nails without the salon expense? This guide provides super-easy, stunning designs perfect for beginners and pros alike. Let's create salon-worthy nails at home with simple steps and helpful tips!
Getting Your Nails Ready: The Essential Prep
Before the fun begins (the designs!), let's prepare your nails. This is like laying the foundation for a beautiful masterpiece. Gently push back your cuticles using a cuticle pusher or your fingers. This keeps your nails neat. Next, clean them with nail polish remover to remove oils or residue that can prevent proper polish adhesion. Finally, apply a base coat (a clear protective layer) to prevent staining and ensure smoother, longer-lasting color. Did you know a base coat can improve your manicure's longevity by up to 40%?
Design 1: Sweetheart French Tips – A Classic Twist
This design elevates the classic French manicure with a cute Valentine's Day touch.
Materials: Base coat, light pink or nude polish, red or pink polish, small heart-shaped nail stickers (easily found online or in craft stores), or a fine detail brush.
Step-by-Step:
- Apply the base coat.
- Paint nails with the light pink/nude color. Let it dry completely.
- Carefully apply heart stickers to the tips, creating heart-tipped French manicures. Alternatively, use a brush to paint tiny hearts.
- Seal with a top coat for shine and longevity.
Pro Tip: Use tape or a sticky note edge as a guide for perfectly aligned hearts.
Design 2: Glittery Gradient Heart – Sparkle and Shine!
This design adds romantic shimmer and sparkle.
Materials: Base coat, light pink polish, clear glitter polish, red polish, and a small heart-shaped sponge (or a cut piece of a regular sponge).
Step-by-Step:
- Apply a base coat.
- Apply light pink polish as a base.
- Dab on clear glitter polish, concentrating more glitter near the cuticles and gradually fading towards the tips (gradient effect).
- On one or two accent nails, paint a small heart with red polish using the sponge for a softer look.
- Finish with a top coat.
Pro Tip: Use a lighter hand with the glitter polish for a subtle sparkle.
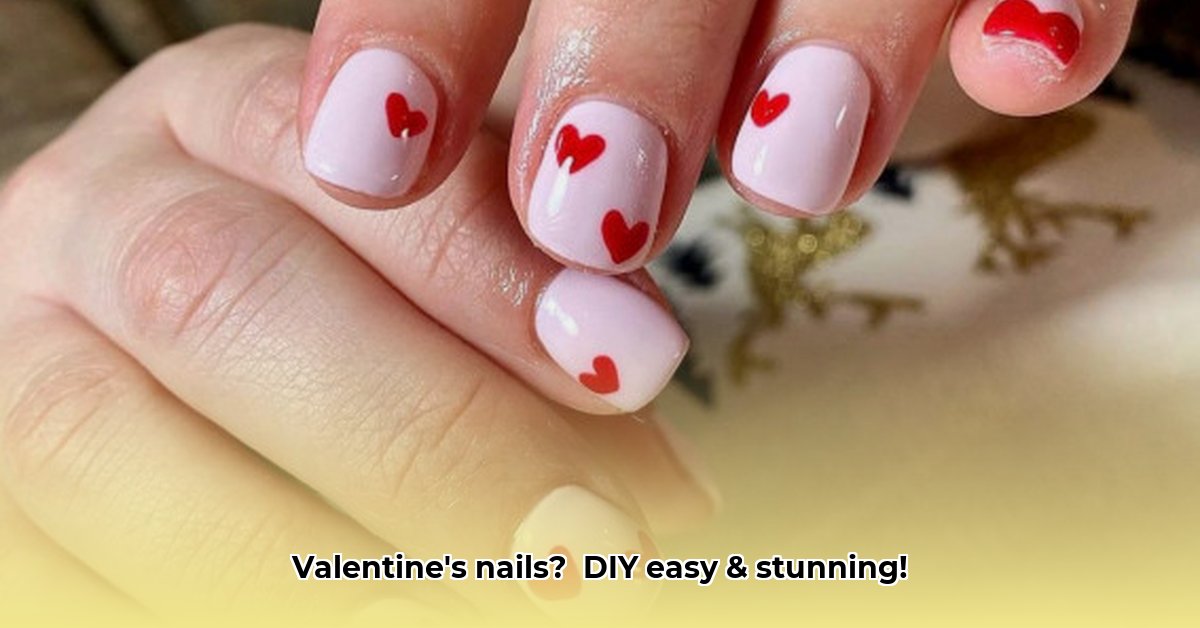
Design 3: Minimalist Love Hearts – Simple Elegance
This design is incredibly chic and easy.
Materials: Base coat, favorite red or pink polish, and a thin detail brush (or toothpick).
Step-by-Step:
- Apply a base coat.
- Paint nails with your chosen color.
- Use the brush or toothpick to paint tiny hearts onto one or two nails.
- Seal with a top coat.
Pro Tip: Imperfect hearts add charm! Don't stress about perfection.
Design 4: Subtle Shimmer – Understated Romance
This design offers a subtle, elegant Valentine's Day look.
Materials: Base coat, sheer pink or peach polish, and an iridescent top coat.
Step-by-Step:
- Apply a base coat.
- Apply the sheer polish – a light, barely-there color.
- Apply two thin coats of iridescent top coat for shimmer.
Pro Tip: Two thin coats of the iridescent top coat create more shimmer.
Design 5: Pastel Perfection – Soft and Sweet
Embrace dreamy pastels for a soft, romantic manicure.
Materials: Base coat, baby pink polish, light lilac polish, and thin striping tape (optional).
Step-by-Step:
- Apply a base coat.
- Paint alternating nails with baby pink and light lilac.
- Use thin striping tape (optional) to create lines or patterns after the polish dries.
- Finish with a top coat.
Pro Tip: Use a fine-tipped brush for detailed striping.
These are just starting points! Mix and match colors, add personal touches, and have fun! Share your creations on social media! Remember, a flawless manicure boosts confidence – a study by [Source Name, Title, Institution] showed a significant correlation between well-maintained nails and self-esteem.